
As a photographer, you really want to show off your work, and I although I was happy with the ease of bloggers interface, I've never liked for one second, how small (even the largest selection) the photos are. You never really see the great detail.
First, I switched templates. Rather than use the standard 3 column template, I use the 2 column minima stretch. This gives me that extra column that I did not use (most regular bloggers done) to put larger photos in. You can still customize this if you like, and there are tons of free blogger templates on the internet, but this is what has made me the happiest so far.
First, you have to edit your photos in whatever photo editor you like best. I use mainly Paint shop pro. And for the record, I use version 5. I probably won't upgrade, as I like it and have used it for going on 10 years now! I also use PSE but only to enhance and do a few tricks the old PSP can't.
Resize your photos to the size you want them. I make all my horizontal photos 700 pixels wide, and verticals 700 pixels high. I think it fits in the column well, and is still a smallish sized file. Now for the record, some of you might be getting cut off photos if you're running a smaller resolution than 1440 wide. I apologize. It looks great for me. I have a wide screen monitor so I "see more". If you are still running 800 x 600 (and 2.83% of you do, you might look into getting a new monitor, you will be much happier, and they'll be room for your cat to sleep on your desk right in front of you :)
Next you'll need to open a flickr account.
Flickr is free, or paid. You can completely get away without a paid account for a while. There's a 100mb limit, and I believe others can only view the last 300 uploads, if you get past that it would probably be worth it to you to pay the $25 per year to upgrade to a pro account.
Log into your account, and click:
>You
>Upload photos and videos
>Choose photos and videos
>Find photo on your hard drive
>wait for the upload
If you want, you can make it a private photo that only you can view. If you choose to let it be public, then anyone viewing your photo stream will see it. That's not a bad thing necessarily, depends on how public you want your blog to be.
Because I also use my stream to show of my photos to other photographers, about 3/4 of my photos that I post here (just snapshots, basic pics) are private to my stream, but public here.
After your photos upload, you can choose to tag it, title it and leave a description of the photo. You then click on the image after you save it, and you will see the photo of your account when you're logged in looking like this:

At the top, click on "all sizes"
You'll then see a screen that looks like this:
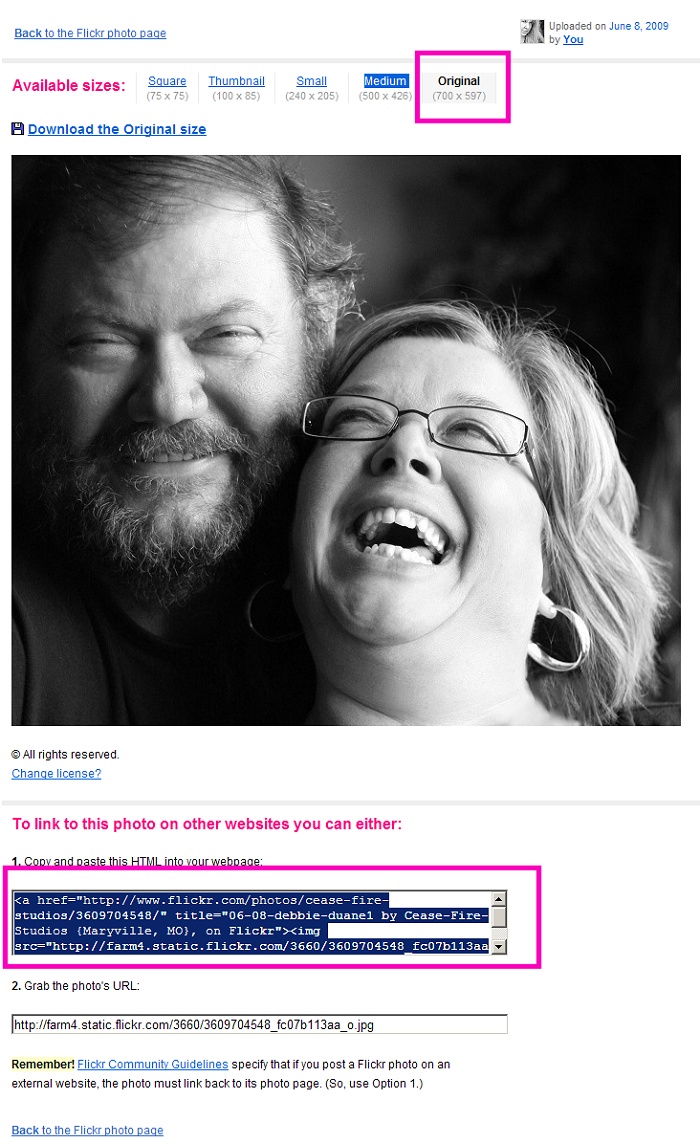
You'll want to choose the size you want your image to be displayed on your blog. Because I sized the image to the size I want on my blog, I pick "original size". At the bottom, copy the text in the top box.
Flickr terms of use state that if you use a photo outside of flickr, that you must allow it to be linked back to the original photo (draws traffic for them). This is GOOD because now they are using up their space and their bandwidth. woot! (bandwidth doesn't matter with blogger, but might if you're hosting your own blog).
Now you need to over to blogger and create a new post like normal.
BUT, instead of going the "compose" tab (there are 2 tabs at the top, compose and edit html), you need to choose "edit html). This is where you'll paste your link from Flickr. If you don't, you'll be posting the actual text of the link on your blog, and not the photo. oopsy.
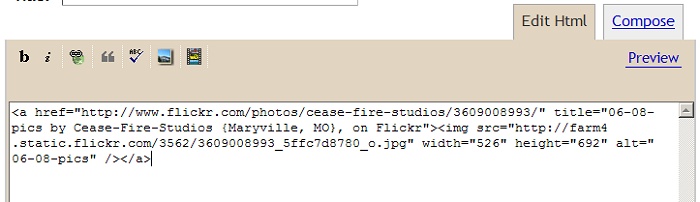
To be honest, I actually do most of my typing on the edit html side. Sometimes blogger is wonktacular, and reformats my posts, so I find working on the edit html side is much more user friendly for me.
If you don't know any html at all, just don't touch any of the link you posted or any of the html the composer creates for you.
Preview your post to see if it looks how you want it, don't forget to spell check (I do that on composer side) I also center my photos on the composer side too... then hit publish post! Your pics should show up now!
Disclaimer: I am not, nor do I claim to be an expert in blogger or flickr. This is what works for me!


No comments:
Post a Comment